Showing posts with label knife. Show all posts

Saturday, February 28, 2026

German hunting trousse, part XIII

After the trouble with stretching the facing over the side pockets on the last sheath, I contacted Tandy Leather about what kind of hide would work better for this purpose.  They recommended either a milled shoulder or sheepskin, with the caveat that neither of these would firm up when wet-molded.  At the time I went to place my order, the sheepskin was sold out, so I ordered the milled shoulder.  In the meantime I made an entire new core and side pockets.  I attached the side pockets this time with pitch glue, though that may have been a poor choice because it's very hard and brittle.  Otherwise, I proceeded in the same manner as before, up through the initial wet molding of the facing.

The milled shoulder did indeed stretch more, leaving little slack above the side pockets.  However, the same quality also allowed it to mold to every uneven spot on the side pockets, giving the scabbard an overall lumpy appearance.

In preparation for the final application, I shaved down the lumpiest parts somewhat.

Because the folks at Tandy expected the milled leather to remain soft after molding, which it did, they suggested installing an extra belt loop under the facing.  I used a short strip of thin but firm veg-tan with the ends and edges (outside of the middle section that was to actually go over a belt) tapered down to reduce the appearance of unsightly ridges.  Since stitching would be at risk of damage from the blade and rivets would risk damage to the blade, and both would be difficult to achieve, I glued the belt loop with contact cement.

A 1-inch belt blank with burnished edges inserted under the wet facing and belt loop to ensure that it would remain open after molding.

Lesson learned, this time I  didn't use any glue; the facing is held on only by its own tight fit over the core.  I also didn't try to pre-lace the facing before the final fitting.

I finished with some Fiebings Pro Dye and a couple applications of acrylic Leather Sheen (my bottle of Resolene is missing).  I worked the dye and finish as far in as possible so as not to leave patches of undyed leather visible.

Current state of completion, with some Fiebings Pro Dye and a couple applications of acrylic Leather Sheen.  At this point the set is useable, provided I have a belt that can carry it.  I though it would be necessary to add a metal throat to prevent the pins on the knife and fork from marring the facing, but for whatever reason they actually stand off a few millimeters.  However, I haven't seen a 17th-century hunting trousse without scabbard fittings, which always seem to have been either silver or steel.  I will have to give careful consideration on how to make them, since steel would be the best choice in this case but I have never made steel fittings, and my attempts at soldering steel have been much less successful than brass.

The other issue at the moment is that it's been very difficult to sheathe and unsheathe the by-knife, at least the final inch of it, which is necessary to also be able to sheathe the cleaver.  I haven't oiled or waxed the leather yet; hopefully it'll be easier once that's done.

Another thing that went wrong in the intervening months is that minute amounts of red rust have appeared both on the blade (while I was molding the leather) and in crevices of the fittings, particularly where the nagel is set into its groove.  I applied Ospho with an Q-tip, and once it was well-dried, worked epoxy into the deep crevices, wiping off as much as possible from the more accessible surfaces before re-polishing them.  Time will tell whether these efforts provide effective protection.

Tuesday, June 10, 2025

German hunting trousse, part XII and the unexpected problem

I settled on glueing the fork pocket with the seam inward and not to include a plate over the side pockets.  Fitting the outer facing was tricky; it had to be stretched to fit smoothly over the side pockets without leaving a lot of slack sticking out the sides.  For this reason I wet-molded it first.

To try to keep the facing from crushing the side pockets, I inserted the knife and fork.  To keep the facing smooth above the pockets and prevent the protruding rivet heads from making marks in the damp leather, I placed some small brass plates.  The space between the top of the scabbard and top of the side pockets is almost exactly two inches.

To get the facing to mold as closely to the core as possible, I used most of a bag of binder clips.  These somehow seem to have stained the back with little black spots, possibly from exposed steel on the edges reacting with the veg-tan (similar to vinegaroon).

Once the facing was dry, I trimmed to down to the straightest, closest edges I could manage using a combination of an xActo chisel point and scissors.


It was while punching the stitch holes that I remembered to add the belt slits, which have to be done before stitching or I would risk damaging the inner layer while cutting them.  This method is, again, inspired by one used on the Bruegel messer.  If I'm going to add a metal throat and a hoop supporting the top of the pockets, it's necessary to add the slits between them.

My plan was to loosely stitch the outer layer, soak it, insert the core and tighten the stitches one by one.

It proceeded according to plan except that I could only manage a single whipstitch with the length of linen thread I'd cut.  The outer layer shrank nicely against the core.  The problem of the facing above the pockets being a bit too large remains, but while unsightly, it's not too bad for me to overlook on a first attempt.

The use of two brass plates had caused a visible line across the top of the facing during the initial wet molding, so this time I added a single two-inch plate.  This did seem to help.

Unfortunately, a new problem came up at the end:  It seems that some of the hide glue I added to fix the facing in place either soaked through the wet leather or got out at the seams and onto the facing.  The glue appears to have interfered with the absorption of the spirit dye, so that repeated brushings of dye failed to get rid of the patchy appearance.  Whether this problem can be solved at this point and how, I'm not sure.

Monday, May 26, 2025

German hunting trousse, part XI

I initially intended to make a box-style wooden scabbard core for the cleaver, but after examining how the Bruegel messer scabbard is constructed and contacting Tod's Workshop, I decided to see whether I could make a similar style here.

The messer scabbard is two layers of fairly thin veg-tan.  The inner layer is unstitched, while the outer layer has a flat Z-shaped double whipstitch, unlike the double running stitch I'm used to using that leaves a ridge down the back.  The double running stitch is used because it helps keep the stitching away from the blade so that it's harder for the blade's point to catch on the stitching when resheathing.  An unstitched layer obviates that risk entirely, but I don't know how they manage to mold the leather to the blade with no stitching holding it in place.

In any event, I felt the need for stitching in the core layer, but also to keep the point at least somewhat away from the stitches.  So after measuring and cutting the leather as usual, I trimmed it until it looked like it would just barely wrap around the blade and meet in the middle, then poked stitch holes at an angle so they came out the sides of the cut edges.  I stitched with size 40 linen thread and soaked the core with alcohol.  On the suggestion of Sword Buyers' Guide poster erichofprovence, I made the core and side pockets rough side out, in order to encourage better adhesion between them and the rough inner side of the facing layer when everything gets glued together.  Because it seemed like it was going to be on the loose side, I tried to make sure it dried more snugly by warming it gently over a heater to shrink it, letting it spend plenty of time off the blade, and not wrapping the blade with tape.

The side pocket for the carving knife offered no such easy solution.  The 2-3oz. leather is too thin to poke angled holes out the edges.  A normal butt stitch would leave the thread exposed to the knife point.  A normal side welt would add unwanted bulk, and a double running center seam would create a ridge that would either prevent the pocket from lying flat against the core (if it were on the back) or be visible through the facing (if it were on the front).  What I settled on was to mold the pocket so the seam ran along the blade's spine and slightly to one side and down, so that it's not threatened by the blade's point or edge and lies flat against the core.

An interesting thing to note is that the rosin varnish, even after drying in the sun and then ageing for almost two years, still gets sticky whenever alcohol gets on it.

The side pocket for the fork was simpler, and in fact I think it's better not being molded, so the leather doesn't shrink in such a way as to prevent the tines from sliding freely in and out.  I did add a very small, thin welt at the tip, but this doesn't seem to prevent the tines from sliding between the stitches if the fork is pushed in too far.  I don't think of this as a serious problem.

For the time being, I'm instead wondering whether to turn the fork pocket with its side seam inward or outward.  The cleaver blade being a relatively narrow one, the main scabbard doesn't leave room for the knife and fork pockets to sit separately like in most hunting trousses.  Instead, they'll need to overlap.  For me the next question is which way will cause less of an unsightly ridge and allow the facing to lie most smoothly.

A separate issue is whether to include a leather plate with a pair of slots for the knife and fork to pass through, covering the mouths of the side pockets.  Real hunting cleavers normally had a metal plate (the metal being whatever steel, brass or silver the rest of the scabbard mounts were made of, attached to a worked metal hoop that went around the entire scabbard, presumably to help prevent the mouths of the side pockets from being crushed) although I've seen one that appears to be made of either wood or leather, and absent the ability to weld, I may be forced to rely on leather.  However, there may not be room for a plate here at all.

All this relates to the question of how much metal hardware I'm putting on the scabbard; the Bruegel messer's scabbard, for comparison, has none at all, and although they're from slightly different time periods, I can't help but think of the messer and trousse as forming a matching set.  If I made a chape and throat for the cleaver, I'd feel compelled to make one for the messer as well.

Monday, April 15, 2024

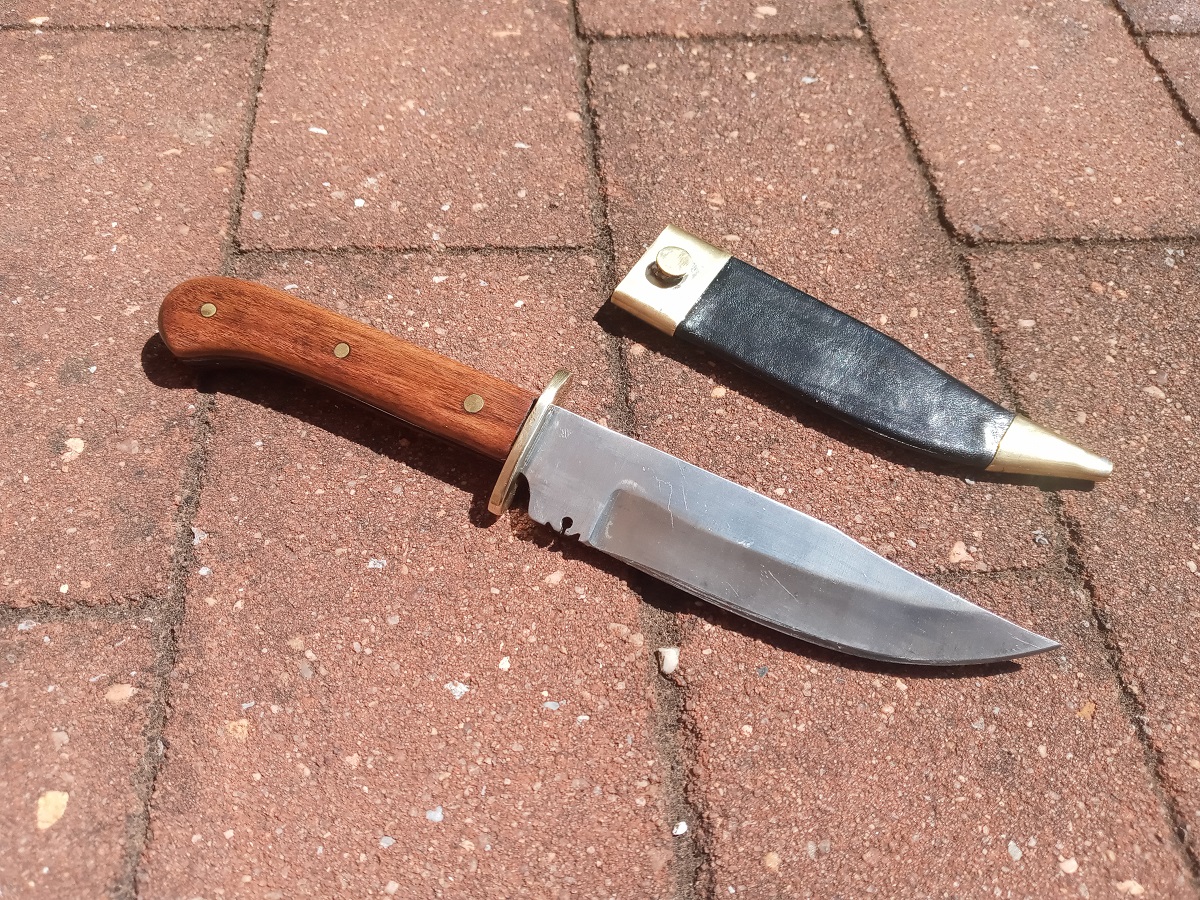
Boot Bowie from commercial patch knife

A couple years ago I bought a cheap "large patch knife," made in Pakistan.  While I'm not aware of any historical knives that it resembles, some of its features make it look like a 19th-century Bowie knife.  It really lacked only a guard and a more appropriate scabbard.  So last year I set about turning it into one, and I've just gotten around to finishing the job in the last few days.

It may seem at first glance more sensible to start with a bare blade of the same pattern; however, I have reason to believe that these blades when sold unfinished are not always hardened, whereas the knife I bought was well-reviewed, with no complaints about its edge retention.  That and some shopping around indicated that I could get a finished knife cheaper.

What I feel was a mistake was not saving the scales, which were some kind of probably tropical hardwood and, I suspect, tougher than the wood I replaced them with.  Keeping them would've made refinishing much faster.  They weren't glued on; actually I don't think there was anything really holding them in place except the pins, which were ground down to make the fit flush.  Unfortunately I wrecked them in the process of prying them off.

19th-century Bowies with straight backs and upswept edges seem to be very rare, so the first modification I made after removing the scales was to grind on a clip point.

The finger guard is an inexpensive sand casting from Crazy Crow.  The first step was filing out its slot so that it would fit over the pommel swell of the tang.  I next had to figure out a way of fixing the guard.  A scale-tang knife can have a fixed guard pinned between the shoulders and scales, but this one had only one shoulder, which was sloped, and the tang was wider at the butt end, so even if the guard couldn't slide up and down, it would be able to slide side-to-side.

Killgar at BladeForums suggested a solution:  pinning some pieces of brass bar in place and soldering the guard to them.  I didn't entirely understand the idea, and wound up making the guard's slot wider to fit over the brass strips, which makes it a bit uglier to look at.

The scales are cherry, also from Crazy Crow, with inlets sanded in so they fit over the brass strips.  Another way of doing this that is only just occurring to me would have been to make the brass in the form of full-profile liners, which would obviate the need for inletting the wood scales.

The cherry wasn't as dark as I'd have liked, so I stained it with Minwax mahogany mixed with just a bit of Minwax ebony.  I then applied boiled linseed oil and finished with Tru-Oil.  Pinning the scales left them dented and dingy, so I sanded most of the damage out, re-stained and re-finished.

The scabbard is lightweight veg-tan.  Sheffield scabbards seem to have normally been black or red.  Since I have no red leather dye left and I've never been able to satisfactorily neutralize vinegaroon, I used Fiebings pro black, sealed with Resolene and gave it a light oiling by filling it up with olive oil and immediately pouring out the excess.  The fittings are brass, fitted in the usual way, with a fabricated and soldered frog button and a stapled throat (stapling was tricky this time because the sheath fits very tightly around the blade's ricasso).

Here it is next to a non-modified example.  The grip as I made it has a very slight overhang around much of the tang.  The non-modified one must have been flush when it was made, but at the moment the scales seem to have shrunken, most likely due to changes in humidity, and some of the sharp edge of the tang is exposed.  In this way the new grip is more comfortable.


Less fortunately, the added guard leaves less room to grip.  It just barely fits in my hand (glove size medium); for anyone with larger hands it just wouldn't work.

While the frog button allows the scabbard to be worn on the belt, the small size makes it just as appropriate as a boot knife or even in a large overcoat pocket.  However, due to the tight fit in the ricasso area, it's not currently possible to push the scabbard off with the thumb the way I normally would prefer to do when drawing such a knife from a coat pocket.  The solution I'm currently attempting is to dampen the sheath and shove a smoothed 1 x 1/8-inch brass bar into the top to stretch the leather.

Monday, June 19, 2023

German hunting trousse, part X

The cleaver came together much like the accessories:  scales oiled and varnished, allowed to cure in the sun, then glued and set with mild steel pins.  No process pics this time, it was too messy.

I accidentally left the scales out overnight in what I thought was an aluminum tray.  It turns out it was non-stainless steel.  Dew collected under the scales in the morning, causing the scales to swell, the oak tannin to react with the steel and create black stains on the undersides of the scales, and the surface of the tray to rust.  Also an animal pooped in the tray, though thankfully nowhere near the scales.  The warping resided after a few days indoors.

I had earlier found that when the accessories, whose scales were attached with pitch glue, were allowed to get too hot, the glue softened and exuded out of the seams.  I attached the cleaver's scales with epoxy and set the pins while it was still liquid.  This was not a good idea, as the epoxy got onto the scales and was very difficult to wipe off.  The finish is therefore duller than it should be.  In this regard, it may have been better to use pitch glue, which would cool and harden rapidly.

The hilt is not comfortable to hold thanks to the protruding washers, but perhaps this would make for a more secure grip, or historical washers may not have been as highly domed as the ones I used.  The pins required many little taps with a light ball peen hammer to tamp down the edges of the peens and prevent them from scratching the palm of my hand.

This project is far from over.  It will require a specialized scabbard with side pockets for the accessories and custom steel mountings, and possibly a belt, before it can be considered complete.

Monday, January 2, 2023

German hunting trousse, part IX

I next returned to working on the cleaver.  I've been putting it off for a long time because of technical challenges that I was unsure of how to deal with.

Firstly, a method of how to fabricate the side ring rivet and affix it in such a way that it wouldn't rotate in the rivet hole had long eluded me.  Many of the originals have spike-shaped extensions sticking up from the rings along the bolsters which I surmise were created by sophisticated forging techniques and incorporate extra pins.  Fat chance of me accomplishing anything like that.  However, not all of them are constructed this way, and I eventually came across a post on myArmoury by Lukas Mästle-Goer which shows an alternative method:  The side guard - in his case a shell Nagel for a Rugger, but it would work just as well with a Waidpraxe's ring - has a rectangular base that fits into a slot on the face of the bolster, locking it in position.

With this understanding, I drilled a 5/8-inch hole in a bar of mild steel, cut out the ring around it with an angle grinder, and ground and filed its shank down to a round cross section 3/16 inch thick.

The other problem was no more complicated but will take longer to explain:  Most hunting cleavers of the 17th century have a finger guard on the edge side of the blade that protrudes out past the blade shoulder.  This seems to have been created in one of two ways:  Either the bolsters are forged as a single piece that semi-encloses the tang, with the two bolsters held together by the finger guard itself, or they're made in two pieces and the tang also features a protrusion that they're sandwiched on either side of.

Because I can't weld and the Crazy Crow blade has no such extension, my first attempt to deal with the problem was to create a pair of bolsters with protruding finger guards, soldered together by a small piece of filler steel.  However, this proved unfeasible.  The filler piece was a hair too thin and the tang wouldn't fit into the guard.  I tried grinding out the inside, but the solder wasn't strong enough to stand up to the vibrations and the guard fell apart.  After re-soldering and re-grinding several times and getting nowhere, I put the whole thing on hold.

Again, myArmoury came to the rescue.  At a later date, I found a post by Radovan Geist of a knife that looked a lot like the one I'm working on, although it is intended as a Bauerwehr (thus again a solid shell Nagel instead of a ring).  It even had a little un-beveled section of blade shoulder just like the Crazy Crow blade's ricasso, which Radovan used as the support for the bolsters.  Looking through my collection of hunting cleaver photos, I realized that a handful looked quite similar with small finger guards that didn't protrude past the edge of the blade.  This was the solution.  (I also copied his idea of adding a thinner pin hole to the blade shoulder so that the bolsters could be pinned there as well.)

Starting fresh, I cut two new pieces of mild steel in approximately the shape required.  Another problem soon arose:  The part of the blade that transitions from the tang to the ricasso becomes thinner, and while the transition is more-or-less flat on one face, it's curved on the other.  This meant that while one bolster could just sit as it was and be pretty much flush with the blade, the other needed to be ground on the inside to match the curve; otherwise, it would teeter across the tang's surface, leaving a large gap on one edge or another.

 
The bolster partly through shaping.  I managed to get it not quite so bad after a few more passes of the angle grinder's flap disc, but perfection eludes me.  In this project I won't feel so bad about using a modern epoxy to fill the gaps..

Once that was done, getting the profile perfect was simply a matter of glueing, drilling, and grinding the edges flush with the tang.

After that, the bolsters could be detached and rough-shaped.  Adding the slot for the ring was another tricky step:  Unwilling to risk mayhem with the aggressive angle grinder, I instead used my Dremel with a fairly small flat stone grinding disc.  This took longer but I believe reduced the chance of the slot coming out crooked.  I finished it with coarse files.

Next I added some decorative grooves freehand with needle files, then polished everything up.  Finally, it was time to peen the pins and rivet.

I epoxied first, then set the smaller pins - a cut section of 1/8-inch common nail as used throughout this project, and an annealed section of thinner finishing nail in the shoulder area.  Then I ground and polished out the dings.

 
I set the ring rivet last, after annealing, re-polishing, and shortening the shank.  To prevent the ring from being marred, I put the 5/8-inch drill bit through it and had it rest on two steel blocks with the ring between them.  The bit supported the ring and prevented it from popping out as the shank was peened.  Then I once again ground and polished the peen to be less protrusive and visible.
 
The cleaver with rough-cut oak scales and washers.  I'll be getting them closer to their finished shape and might start the scabbard over the next few months, but this is the last update I'll be sharing on the cleaver until spring, when the weather warms up enough to varnish the scales.

Thursday, September 22, 2022

German hunting trousse, part VIII

The knife is a traditional Jagnicker blade of a type that originated in the 19th century.  It strongly resembles earlier forms, but has noticeable differences.

Using my trusty angle grinder, I reduced the size of the bird's-head, flattened the grip belly, and ground away as much of the finger guard as I felt comfortable removing.  The slight bolster left behind is still not historically accurate, but I've resolved to live with it.  I then applied the scales, pins and washers as with the fork.

I haven't thrown away the old belduque blade; in fact, I already have a project in mind for it.

The set so far.  You'll notice the sanded-down edges of the scales are much paler; this should be resolved when I get to varnishing.

Sunday, February 27, 2022

Vampire-slaying dagger

This dagger was a mini-course in processes I hadn't tried before or hadn't pushed this far.  It has a Solingen-made blade with deep saltwater etching.  The resist for this step is nail polish; I found that permanent marker and paint pen both rubbed off too easily, while the nail polish is very tough and can only be removed with a powerful organic solvent.  The original etching came out very dark, and I found it also seemed to have a little red rust despite the blade being a fairly high-chrome stainless.  (The steel-soaked q-tips also turned red very quickly.)  I sprayed the blade with Ospho to neutralize the rust, but this produced a dull coating which I had to sand off, which in turn required me to re-polish the blade, removing much of the dark patina in the process.  As a result, this now looks more like a typical acid-etched blade, which I guess isn't a bad thing.

The guard and pommel are nickel silver (the pommel is called "white brass," but I suspect that in this case, they're approximately the same thing).  I had to tap the pommel to match the unusual 10-32 blade thread - most blades of this sort are threaded 10-24.  It was excruciating, took two tries, and gave me a blood blister on one finger.  Despite my best efforts, the first pommel wound up with a badly off-center hole; the second is still slightly off-center.  The ferrule and chape are fabricated from nickel silver sheet.

For a while, I was puzzled about how to make the grip.  The tang doesn't taper until it reaches the threaded end, which makes filing out a hole very difficult and time-consuming.  On the advice of several members of BladeForums, I built an initial grip up by ripping a 1/2-inch wide section off of each of two paper micarta scales, thinning them down to match the tang's thickness, epoxying the layers together, and then attempting to turn the assembly to shape.  Unfortunately, the micarta is so smooth and impermeable that the epoxy didn't hold it together, and the assembly exploded when I tried to turn it.

In the end I used a solid wood grip and filed it out the slow way after turning.  It's American walnut, double-dyed:  first with vinegaroon, which turned it charcoal grey and ensured that no deep grooves maintained their natural color, then with Minwax ebony stain to turn it deep black.  I did not neutralize the vinegaroon; my earlier experiments showed that a subsequent baking soda rinse turns the walnut brown (and not a nice brown like it was before).  It's given linseed oil and then sealed with Tru-Oil.  The spiral wrap is silver-plated copper wire which I twisted at home.

The sheath is 4-5oz veg-tan, dry-stitched with black artificial sinew (I did not use contact cement, in order to avoid any spots which wouldn't absorb dye), dyed with Fiebings Pro Dye and finished with Resolene, neatsfoot oil and Sno-Seal.  I did not apply Resolene on the flesh side this time, and I think this prevented it from becoming too stiff.  Before stitching up the sheath, I added a screw-back button stud (nickel-plated brass).  I'd read that to prevent the button coming loose, I should put a drop of Loctite inside before screwing it together.  I used Go 2 Glue (Loctite's all-purpose formula) and only later realized that the Loctite in question was referring to Threadlocker.  Apparently Threadlocker Red 271 is the preferred type for setting the button permanently.

Due to the pommel being quite heavy for the blade, the retention strap with snap is absolutely necessary.  I haven't mastered setting the snaps so that the internal metal deforms evenly, so the snap is still slightly less secure than I'd like.  As for the double-capped rivets, they're very light; probably strong enough, but they should be domed, and without a specialized setter, hammering them to set leaves them completely flat.

The chape is the usual simple rolled cone.  I made a curved tip and ground the end of the chape to fit it, soldered it on, then ground the end smooth.  Then I cut out a drag to fit it, and etched it in ferric chloride.  Although I tried to give it a thorough resist with permanent marker, the raised areas came out rather streaky and the etch isn't very deep.  I suspect whatever formulation of nickel silver this is is more resistant to the ferric chloride than yellow brass.

Soldering the drag was also tricky, as the way the chape tapers means that the drag has to be seated on supports (I used bits of scrap brass) at a slight angle so that it will be straight relative to the chape.  The chape then had to be slid in between the supports.  I turned them both face-down and lay thin strips of solder on the back of the drag along the seams so that they wouldn't get onto the front and fill in the etching.  There are still traces of solder on the back of the drag, so I'm sure this was the right decision.

On the whole, I'm satisfied with everything except some minor imperfections.  The blade etching is definitely not as neat as the stenciled etchings of a professionally-made sword.  However, keeping in mind that the real thing would actually be damascened in silver by hand instead of etched, some raggedness is to be expected in all but the most expensive versions.  (As well, the fittings should all be a genuine albeit low-fineness silver alloy - plating would not be used, because it wears off with too many polishings.)

This is the generic type, issued to Milites Ecclesiæ members who weren't affiliated with a specific order.  With slightly altered devices, the same lodge dagger would be issued to the Ordo Fratrum Calvariæ Loci, the Sancti Societas Vampyri Catholicæ, the Legio Sīcāriōrum, and hundreds of similar chivalric orders organized under the ME.

Tuesday, February 8, 2022

Jagdnicker

The Jagdnicker is a traditional style of Bavarian hunting knife.  Its name means "hunting nicker," the term "nicker" having no English translation that I know of but referring to a particular method of finishing a wounded game animal.  In modern times the exact form varies a lot; this one is an old style, but with some modifications.

The conceit behind this one is that it's a replica of the one carried by Robin McKay.  Because it's made to be carried in a marine environment, all the metal is stainless steel, except for the brass pins and lanyard tube and nickel-plated brass rivets.  The blade is an 11cm graved-back flat tang from Weber Messer, which is 23cm (just over 9 inches) overall.  Jagdnicker grips are classically, and almost invariably, made of antler, but I don't like working with antler - it's basically bone, so it smells foul when being ground and cracks too easily.  Holding antler grips also tends to leave a funny smell on your hands.  The grips on this one are ash, dyed and stabilized by K & G Finishing Supplies, epoxied and sanded up to 3000-grit before the pins are set, then waxed and buffed.  The wrist loop is 2mm waxed hemp.

The sheath design is the modern German style.  I made it from 4-5 ounce veg-tan; it's stitched with black nylon artificial sinew to resist rot, dyed with Fiebing's Pro in dark brown, sealed with Resolene, and finished with neatsfoot oil and Sno-Seal.  I was very concerned that the knife should never fall out of the sheath when it's not in use, since if it were to plunge into the ocean, you'd never see it again.  In theory, the two snaps prevent this, but I find they open slightly more easily than I'd like.  They are stainless line 20 line snaps from Tandy.

Lastly, I included a belt dangler, riveted closed, with a square aluminum screw carabiner so that the sheath can be quickly removed and e.g locked in a glove compartment when one is entering an establishment where large knives are not welcome, without having to take off the belt.

I like the profile of these old-fashioned knives.  However, the full flat grind from the spine makes the edge a bit too dainty for my tastes, even with the spine being 4mm thick - at this length, most utilitarian knives would have a spine of around 3mm, but also a significant secondary bevel beefing up the actual cutting edge.  According to Fimbulmyrk, this very thin edge is a deliberate feature of Jagdnickers called nagelgehend (apparently translating to "nail-going"?) and I have no doubt that it would make for an extremely sharp blade capable of slicing and skinning easily.

Tuesday, January 4, 2022

Fancy fancy knife

A "spare parts" project. I've had a kit-built Scottish dirk hanging around my house for the last 16 years or so.  I was never very satisfied with it, and a few years ago, after I deciding I wanted to add a sax (not the musical kind) to my collection, I settled on using the dirk blade rather than spending more money on a new one.

This is largely a fantasy knife, although its pommel is based loosely on the Nijmegen sax.  The hilt is inspired by the Thorvaldr's Sax by Matthew Berry and one created by Petr Florianek.  It has a mahogany grip and holly spacers finished with linseed oil.  Admittedly, the mahogany is wrong for something meant to look Northern or Western European, but it's what I had on-hand; same with the yellow brass (I believe ancient brasses were more reddish).

Since I didn't have confidence in my ability to replicate the same carving in mirror four times, I instead gave it four different animals, a horse, wolf, hart and boar.  The lower two brass plates were sand-cast knife guards, while the upper two are fabricated from bar stock.

The pommel cap is fabricated from Crazy Crow stock, which seems to have a lower zinc content and grinds into an almost floury powder.  I etched it with a bird of prey using ferric chloride.  The top end of the tang is round and threaded; historical saxes would have rectangular ones that the hilt parts fitted tightly to.  The pommel is prevented from rotating by a pair of long escutcheon pins that extend through both plates and into the grip.  I ground a pair of pits into the bottom of the pommel cap to make space for the pin heads, then silver-soldered the cap onto the upper plate.  The pommel button is a ground-down steel nut.  The hilt is assembled with pitch glue.

The sheath is 7/8-ounce veg tan, stitched with heavy linen cord, stained with walnut dye, and finished with neatsfoot oil and beeswax.  The dragon is sort of a mix of Migration-period designs (with teeth cribbed directly from the Sutton Hoo shield ornament) with those painted by Professor Tolkien.  At the top of the sheath is a heart and flower taken from northern German folk art, translated into knotwork.

I'm delighted with how the homemade walnut dye worked with this project.  Even after filtering, it contains fine sediments which settle into the tooling crevices, making it a natural version of a commercial leather antique gel.   However, if I were using it on an un-tooled surface, I would want to use several applications to produce a darker stain, as the smooth leather here isn't a whole lot darker than it would be with just oil and wax.

I'm less delighted with the suspension tabs; specifically, setting the pins with a small hammer and anvil resulted in the tabs becoming badly dinged-up.  I'm not sure whether I should try re-polishing them.

Once all the projects for Plataea 2022 are done, I might add a belt and companion knife to go with this one.

Saturday, July 17, 2021

Garter or gambler dagger

I built this one around a German blade of unknown manufacturer or metal content which I obtained last year.  It came with a hard black coating which I've tried to sand off, although there seem to be tiny crevices in the metal that made removing all of it impossible.  I bought the guard from Crazy Crow some years ago; they seem (then and now) to use a faintly reddish brass, which is why it doesn't quite match the other fittings.  The style of small sand-cast guards they sell has changed, becoming much more rounded at the ends.

The grip is American walnut, turned to shape - the first time I have ever created a lathed handle - flattened slightly at the butt end, and with hand-filed ridges above the ferrule.  It's finished with Tried & True Varnish Oil, an old-fashioned varnish made of a mix of rosin and linseed oil such as was used in previous centuries.  I followed directions from The Muzzleloading Forum member Stophel and finished the wood with shellac, adding extra rosin dissolved in turpentine to the varnish to make the final product harder.  The varnish has to be cured outdoors in sunny weather and turned repeatedly to ensure that all sides are exposed to the sun.

The scabbard is 4-5oz. veg-tan, stitched with linen thread and dyed with several applications of cochineal steeped in alcohol.  I finished it with neatsfoot oil and then a beeswax-linseed oil blend, thoroughly buffing off excess color in between.  The fittings are all brass.  At the top is a ground-down hex nut; under it is a washer to hide the width of the tang hole (the tang is not tapered except at the threaded end) and the marks from the lathe's plum blossom bit.  I silver-soldered the ferrule, throat and chape back seams closed; the frog button is also silver-soldered in place.  I think that annealing thin sheet brass to make wrapping it around the scabbard easier also tends to lead to a sloppy appearance, and I may not do it in future.  The ferrule detailing is etched rather than embossed, so the dots and lines are flat on top and have squared edges.  Unfortunately, the staple method I devised of holding the throat in place prevents the guard from actually meeting the throat.  I will need to come up with something better in future.  Additionally, the hilt parts, throat and chape are attached with rosin-beeswax glue.

This pocket-sized dagger is roughly in the style of those made in Sheffield, England during the latter half of the 19th century, particularly (if antiques dealers may be trusted) the 1870s-1880s.  It has a very thick blade for its width, so the edges are obtuse and not well-suited for cutting.  I rarely if ever see these small daggers in frogs, so I suspect they were carried differently, but the frog button does function as a place for the thumb to push the scabbard off the blade.

Sunday, February 28, 2021

German hunting trousse, part V

I've concluded that this unidentified steel is much harder than I'd expected.  I annealed the tang several more times, switched between different sizes of drill bits, broke four or five, and endured much screeching noises before managing to create all the small pilot holes.

In the end, I locked the blade in a vise and gradually widened the holes with a 1/8-inch round file held in a pair of pliers.  When the holes were large enough that the file slid through easily, I ran the 1/8-inch drill bit through each one from both sides, then tried to make it a shade larger with a 9/64-inch bit.  This worked for three of them, but not the remaining two.  I settled for making the holes large enough that the nickel silver pin stock would slide through without much difficulty, which is all that's really needed.
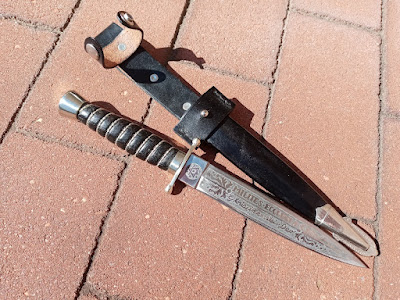

I concluded the week's work by smoothing the reshaped tang edges with a rasp, then polishing them with sandpaper up to 1500 grit and finally the Dremel's wire wheel.  The sandpaper failed to take all the rasp's scratch marks out, but they're only visible on close inspection and I'm not too ashamed.