Saturday, February 28, 2026
German hunting trousse, part XIII
The milled shoulder did indeed stretch more, leaving little slack above the side pockets. However, the same quality also allowed it to mold to every uneven spot on the side pockets, giving the scabbard an overall lumpy appearance.
In preparation for the final application, I shaved down the lumpiest parts somewhat.
Because the folks at Tandy expected the milled leather to remain soft after molding, which it did, they suggested installing an extra belt loop under the facing. I used a short strip of thin but firm veg-tan with the ends and edges (outside of the middle section that was to actually go over a belt) tapered down to reduce the appearance of unsightly ridges. Since stitching would be at risk of damage from the blade and rivets would risk damage to the blade, and both would be difficult to achieve, I glued the belt loop with contact cement.
A 1-inch belt blank with burnished edges inserted under the wet facing and belt loop to ensure that it would remain open after molding.
Lesson learned, this time I didn't use any glue; the facing is held on only by its own tight fit over the core. I also didn't try to pre-lace the facing before the final fitting.
I finished with some Fiebings Pro Dye and a couple applications of acrylic Leather Sheen (my bottle of Resolene is missing). I worked the dye and finish as far in as possible so as not to leave patches of undyed leather visible.
Current state of completion, with some Fiebings Pro Dye and a couple applications of acrylic Leather Sheen. At this point the set is useable, provided I have a belt that can carry it. I though it would be necessary to add a metal throat to prevent the pins on the knife and fork from marring the facing, but for whatever reason they actually stand off a few millimeters. However, I haven't seen a 17th-century hunting trousse without scabbard fittings, which always seem to have been either silver or steel. I will have to give careful consideration on how to make them, since steel would be the best choice in this case but I have never made steel fittings, and my attempts at soldering steel have been much less successful than brass.
The other issue at the moment is that it's been very difficult to sheathe and unsheathe the by-knife, at least the final inch of it, which is necessary to also be able to sheathe the cleaver. I haven't oiled or waxed the leather yet; hopefully it'll be easier once that's done.
Another thing that went wrong in the intervening months is that minute amounts of red rust have appeared both on the blade (while I was molding the leather) and in crevices of the fittings, particularly where the nagel is set into its groove. I applied Ospho with an Q-tip, and once it was well-dried, worked epoxy into the deep crevices, wiping off as much as possible from the more accessible surfaces before re-polishing them. Time will tell whether these efforts provide effective protection.
Monday, December 22, 2025
You can memorize this one
1 cup powdered sugar
1 teaspoon vanilla extract
2 cups flour
6 ounces mini chocolate chips
1/2 cup finely chopped nuts (optional)
Makes six to seven dozen
1. Preheat oven to 325 degrees Fahrenheit.
2. Mix butter, sugar and vanilla in a mixing bowl.
3. Stir in flour.
4. Mix in chocolate chips and nuts.
5. Roll and flatten one-inch balls of dough, place them two inches apart on baking sheets. Or cut or mold like shortbread.
6. Bake 20-25 minutes.
Thursday, September 4, 2025
A smallsword from Armlann Gàidhealach
They strongly resemble the so-called pillow or scarf swords of the previous century, with very short blades (as little as 24 inches) and no knucklebows or finger rings. They were made with a pattern of lightweight rapier blade called a smalle Doljch, which O'Shaughnessy and MacNeill imported from Solingen, where they were made by the small workshop of Hoffmann Schwieets. In Edinburgh, they were shortened from the point and tang end to eliminate the long ricasso and produce a delicate little blade.
I am currently saving up for a standard-pattern "wee claybeg," but I wanted to first get ahold of this absolutely unique variant. It was created in January 1746 along with a dagger and miniature targe for Andrew Aldridge of Beinn Sgleatach, who, however, did not accept or pay for them. This is a good thing, since I wouldn't want to own anything he had owned, for reasons that will become clear.
The blade is a kort Doljch, a shortened version of Hoffmann's earlier heavy rapier pattern, which was also used in pillow swords. O'Shaughnessy seems to have produced this sword as a more battle-worthy version of the wee claybeg, as not only the blade but also the fittings are more massive and sturdier. Hawkins tells me that the matching targe is only 11-1/2 inches wide, which I would normally consider too small for a strapped shield unless the wielder's forearm with closed fist is itself less than 11-1/2 inches from elbow to knuckles. I've usually read that targes were at least 16 inches wide at the smallest; the last one I obtained is this size and feels barely wide enough for me. A strapped shield smaller than that not only provides less protection in general, but, if shorter than the wielder's forearm, would run the risk of allowing blows that strike between the 6 to 8 or 10 to 12 o'clock positions to skate around and strike the elbow or upper arm, and give no protection at all to a sideways blow in line with the elbow. That's why usually the only shields this small are center-gripped, like bucklers or dhals. A tiny strapped shield and short sword only make sense in the hands of someone who was fast enough to get close to an opponent while avoiding their attacks or receiving them in such a way as to avoid being injured.
This actually appears to have been the case. O'Shaughnessy described Aldridge to the Hawkinses as "five fit lang yet unco bonnie an' byous swith." (O'Shaughnessy seems to have been a secret admirer of his, perhaps because she was very short as well.) This letter seems to have been the source of James McKay's description of him in "The children of Ailpean" as "Five feet tall and swift of foot." A popular joke about Aldridge was that his mother, whose identity isn't known, was of the Unseelie. McKay himself was present at Culloden as a lieutenant under Colonel Cornelius Ridge, Aldridge's English cousin. Near the end of the battle Aldridge, who had been saving his last bullet for Ridge, shot at him but only hit his horse. The two then charged at each other with swords, with Ridge very nearly losing the duel due to Aldridge's terrifying speed. Aldridge was only defeated when half a dozen soldiers under Lieutenant Paul Hurt (later a Captain and later still husband of Sylvia Hawkins) surrounded and fired on him all at once. An infuriated Ridge then took McKay's pistol and finished off his injured cousin. In describing the incident to Ridge's nephew Corporal Robert Ridge (who joined the regiment after Cornelius' "suicide" in 1755) McKay claimed that he saw two shadowy little phantoms appear above Aldridge's body, one a woman with long hair who dragged the other away by the hand, and what he described as the laughter of many thin voices like tin whistles heard far away. It was the terror of this experience, as much as the moral repugnance of the Duke's orders, that made McKay and Hurt refuse to participate in the execution of wounded Jacobites after the battle. For this they were both dismissed, though their commissions were reinstated several months later.
It was also this experience that inspired "The children of Ailpean," which described how Ailpean Aldridge and all his descendants were cursed due to a fight between him and the Unseelie princess Cornelia. It is a matter of historical record that all his descendants on both sides of the border died before the age of 50 and violently. The sole possible exception is Andrew's father Geoffrey, who dropped dead shortly after Culloden, and even this McKay attributed to being slain by fairy-shot by Cornelia herself, whom his poem casts as the mother of Andrew and the phantom who dragged Andrew's soul away to join the Unseelie. Cornelius Ridge's "suicide" was rumored to have been murder at the hands of his lieutenant colonel and successor, Sir Laurence Pemberton. Even Robert Ridge would die in the French and Indian War at the age of 25 when his company was ambushed in the woods west of Cayuga Lake. What became of Andrew's possessions is unknown, but "The children of Ailpean" ends with O'Shaughnessy burning Andrew's body, sword and shield on a pyre and burying the remains in an old mound in Beinn Sgleatach to break the curse.
So how do I have these? Armlann Gàidhealach actually made two swords, and a number of other weapons, for Aldridge. These were listed in invoices as "1 short claybeg or 1 wee claybeg," "1 short claymore w. half-basket" "1 wee targaid w. strap," "1 wee targaid w. nae strap," "1 wee dirk w. chip knife," "1 wee dagger" and "2 belts." (What O'Shaughnessy calls a "chip" knife is what we'd call a by-knife, a miniature version of a general-purpose belt knife with a curved cutting edge, carried in a side pocket of a larger blade's sheath or scabbard. Don't ask me where she got the word "chip" from. Although "chib" is a modern Scottish word related to "shiv," these are borrowings from Romani and not attested before the 20th century, so they're unlikely to be related to O'Shaughnessy's "chip." There's also a modern style called a chip knife or chip carving knife, but it has a specialized woodcarving blade with a straight cutting edge and curved spine, so, again, it's probably not related.) The ones he actually bought were the claymore, the targe with no strap, the dirk and its by-knife, and one of the belts. I can only guess what the claymore looked like, but I suspect the targe without a strap was identical to the remaining one except with a central, probably rigid grip, and that he chose it in order to give himself greater freedom to use it like a center-gripped buckler, eliminating the aforementioned problems with a small strapped shield. The short claybeg with its matching belt, small targe with strap and small dagger comprise the part of the assemblage that he didn't buy. I have them reserved but they won't join my collection until I can pay for them. The dirk, on the other hand, was a unique piece that I'm working on reproducing from drawings; you'll see it shortly.
The blade for this sword was custom made for me by Darkwood Armory. For process pics and other information on this project, click here.
Tuesday, June 10, 2025
German hunting trousse, part XII and the unexpected problem
To try to keep the facing from crushing the side pockets, I inserted the knife and fork. To keep the facing smooth above the pockets and prevent the protruding rivet heads from making marks in the damp leather, I placed some small brass plates. The space between the top of the scabbard and top of the side pockets is almost exactly two inches.
To get the facing to mold as closely to the core as possible, I used most of a bag of binder clips. These somehow seem to have stained the back with little black spots, possibly from exposed steel on the edges reacting with the veg-tan (similar to vinegaroon).
Once the facing was dry, I trimmed to down to the straightest, closest edges I could manage using a combination of an xActo chisel point and scissors.
![]() |
My plan was to loosely stitch the outer layer, soak it, insert the core and tighten the stitches one by one.
It proceeded according to plan except that I could only manage a single whipstitch with the length of linen thread I'd cut. The outer layer shrank nicely against the core. The problem of the facing above the pockets being a bit too large remains, but while unsightly, it's not too bad for me to overlook on a first attempt.
The use of two brass plates had caused a visible line across the top of the facing during the initial wet molding, so this time I added a single two-inch plate. This did seem to help.Unfortunately, a new problem came up at the end: It seems that some of the hide glue I added to fix the facing in place either soaked through the wet leather or got out at the seams and onto the facing. The glue appears to have interfered with the absorption of the spirit dye, so that repeated brushings of dye failed to get rid of the patchy appearance. Whether this problem can be solved at this point and how, I'm not sure.
Monday, May 26, 2025
German hunting trousse, part XI
The messer scabbard is two layers of fairly thin veg-tan. The inner layer is unstitched, while the outer layer has a flat Z-shaped double whipstitch, unlike the double running stitch I'm used to using that leaves a ridge down the back. The double running stitch is used because it helps keep the stitching away from the blade so that it's harder for the blade's point to catch on the stitching when resheathing. An unstitched layer obviates that risk entirely, but I don't know how they manage to mold the leather to the blade with no stitching holding it in place.
In any event, I felt the need for stitching in the core layer, but also to keep the point at least somewhat away from the stitches. So after measuring and cutting the leather as usual, I trimmed it until it looked like it would just barely wrap around the blade and meet in the middle, then poked stitch holes at an angle so they came out the sides of the cut edges. I stitched with size 40 linen thread and soaked the core with alcohol. On the suggestion of Sword Buyers' Guide poster erichofprovence, I made the core and side pockets rough side out, in order to encourage better adhesion between them and the rough inner side of the facing layer when everything gets glued together. Because it seemed like it was going to be on the loose side, I tried to make sure it dried more snugly by warming it gently over a heater to shrink it, letting it spend plenty of time off the blade, and not wrapping the blade with tape.
The side pocket for the carving knife offered no such easy solution. The 2-3oz. leather is too thin to poke angled holes out the edges. A normal butt stitch would leave the thread exposed to the knife point. A normal side welt would add unwanted bulk, and a double running center seam would create a ridge that would either prevent the pocket from lying flat against the core (if it were on the back) or be visible through the facing (if it were on the front). What I settled on was to mold the pocket so the seam ran along the blade's spine and slightly to one side and down, so that it's not threatened by the blade's point or edge and lies flat against the core.
An interesting thing to note is that the rosin varnish, even after drying in the sun and then ageing for almost two years, still gets sticky whenever alcohol gets on it.
The side pocket for the fork was simpler, and in fact I think it's better not being molded, so the leather doesn't shrink in such a way as to prevent the tines from sliding freely in and out. I did add a very small, thin welt at the tip, but this doesn't seem to prevent the tines from sliding between the stitches if the fork is pushed in too far. I don't think of this as a serious problem.
All this relates to the question of how much metal hardware I'm putting on the scabbard; the Bruegel messer's scabbard, for comparison, has none at all, and although they're from slightly different time periods, I can't help but think of the messer and trousse as forming a matching set. If I made a chape and throat for the cleaver, I'd feel compelled to make one for the messer as well.
Tuesday, April 1, 2025
A 16th-century peasant's sword belt
Last year I bought a secondhand Tod Cutler 16thC Bruegel Messer on myArmoury. After a few modifications, including dyeing the sheath, I set about trying to figure out how to wear it.
The belts in Pieter Bruegel's (the 16th-century Low Country painter whom this sword is named after) paintings are generally narrow (maybe one inch/2.54cm), dark or black, have D-shaped buckles (though spectacle buckles are also occasionally seen) rendered in grey, and no keeper loop. They're apparently worn a bit loose and low for comfort and ease of movement since the belt appears to attach directly to the back of the messer's sheath. The Bruegel messer sheath has a pair of 1-inch slits in the back for this purpose. While possible, there's no indication that the opposite side of the belt is fixed to the clothing or another belt hidden under the outerwear — the parsimonious explanation, supported by Mikko Kuusirati when I raised the subject on myArmoury, is that the friction of the belt against the wearer's clothing is enough to hold it up.
Unfortunately, I worked a little too quickly and in an awkward position on the floor because the work table I usually use is occupied at the moment. This may be why the back wound up a bit sloppy with spots of dye and finish on it.
For the moment, the belt seems to do its job, although I wonder if it would work as well if I weren't wearing a belt with my trousers for it to catch on.
Sunday, October 27, 2024
Sleigh bell belt for White Christmas
Mom's currently costuming a local production of White Christmas at Newtown Arts and tells me there's where a guy puts on a sleigh bell belt made for a horse and dances around for some reason. For ease of use, she asked me to make this like it was just a regular belt, although it's very long because he wears it over one shoulder and across his chest. This is a 1-1/2x48" veg tan strap with a nickel buckle and linen cord, all from Crazy Crow, finished with Fiebings pro dye, Resolene and olive oil (so it won't smell bad like neatsfoot oil). The stitching holding the buckle fold is based on a belt I bought from a thrift store, although I don't know how they hid the knots (I tucked the ends back into the needle and pulled it through the fold). The bells are from Michaels. In order to not chafe the costume, instead of being fixed with curled brass pins the classic way, the bells are tied on through pairs of small holes with some leftover hemp cord that I had hand-waxed with a block of beeswax when making my small bowcase for Plataea 2022.
Tuesday, July 9, 2024
Things That Aren't Here Anymore, Part VI
Monday, April 15, 2024
Boot Bowie from commercial patch knife
It may seem at first glance more sensible to start with a bare blade of the same pattern; however, I have reason to believe that these blades when sold unfinished are not always hardened, whereas the knife I bought was well-reviewed, with no complaints about its edge retention. That and some shopping around indicated that I could get a finished knife cheaper.
What I feel was a mistake was not saving the scales, which were some kind of probably tropical hardwood and, I suspect, tougher than the wood I replaced them with. Keeping them would've made refinishing much faster. They weren't glued on; actually I don't think there was anything really holding them in place except the pins, which were ground down to make the fit flush. Unfortunately I wrecked them in the process of prying them off.
19th-century Bowies with straight backs and upswept edges seem to be very rare, so the first modification I made after removing the scales was to grind on a clip point.
The finger guard is an inexpensive sand casting from Crazy Crow. The first step was filing out its slot so that it would fit over the pommel swell of the tang. I next had to figure out a way of fixing the guard. A scale-tang knife can have a fixed guard pinned between the shoulders and scales, but this one had only one shoulder, which was sloped, and the tang was wider at the butt end, so even if the guard couldn't slide up and down, it would be able to slide side-to-side.
Killgar at BladeForums suggested a solution: pinning some pieces of brass bar in place and soldering the guard to them. I didn't entirely understand the idea, and wound up making the guard's slot wider to fit over the brass strips, which makes it a bit uglier to look at.
The scales are cherry, also from Crazy Crow, with inlets sanded in so they fit over the brass strips. Another way of doing this that is only just occurring to me would have been to make the brass in the form of full-profile liners, which would obviate the need for inletting the wood scales.
The cherry wasn't as dark as I'd have liked, so I stained it with Minwax mahogany mixed with just a bit of Minwax ebony. I then applied boiled linseed oil and finished with Tru-Oil. Pinning the scales left them dented and dingy, so I sanded most of the damage out, re-stained and re-finished.
The scabbard is lightweight veg-tan. Sheffield scabbards seem to have normally been black or red. Since I have no red leather dye left and I've never been able to satisfactorily neutralize vinegaroon, I used Fiebings pro black, sealed with Resolene and gave it a light oiling by filling it up with olive oil and immediately pouring out the excess. The fittings are brass, fitted in the usual way, with a fabricated and soldered frog button and a stapled throat (stapling was tricky this time because the sheath fits very tightly around the blade's ricasso).
Here it is next to a non-modified example. The grip as I made it has a very slight overhang around much of the tang. The non-modified one must have been flush when it was made, but at the moment the scales seem to have shrunken, most likely due to changes in humidity, and some of the sharp edge of the tang is exposed. In this way the new grip is more comfortable.
Less fortunately, the added guard leaves less room to grip. It just barely fits in my hand (glove size medium); for anyone with larger hands it just wouldn't work.
While the frog button allows the scabbard to be worn on the belt, the small size makes it just as appropriate as a boot knife or even in a large overcoat pocket. However, due to the tight fit in the ricasso area, it's not currently possible to push the scabbard off with the thumb the way I normally would prefer to do when drawing such a knife from a coat pocket. The solution I'm currently attempting is to dampen the sheath and shove a smoothed 1 x 1/8-inch brass bar into the top to stretch the leather.
Saturday, July 22, 2023
Archery set
Unfortunately, at least in the English-speaking world, information on something as specific as Renaissance-era Bohemian archery equipment is very difficult to come by. What little I was able to find seemed to indicate that their stuff resembled Eastern European and Turkic gear, so in the end I modeled it after Ottoman Turkish examples, with the modification of using Western European belt parts (a D-shaped buckle attached by a plate and a chape).
This was the first time I'd stitched fabric over leather. I cut the fabric slightly larger than the bowcase and quiver, cut the edges of the fabric into tabs, folded the tabs under, glued them with Fabri-Tac and then stitched them with linen cord. The result is very rough-looking. I will have to put further study into how this should have been done historically. One thing I've already noticed is that the originals appear to have had fabric with designs woven or embroidered for the case and quiver instead of taking fabric that was woven by the yard with designs already added and cutting it to shape, as I did here.
This was also the first time I beveled and burnished the belt edges and pasted the back. Burnishing tutorials often recommend using a combination of gum tragacanth, glycerin and/or saddle soap, beeswax, etc. To keep things simple, I used TandyPro Burnishing Solution, which is intended to be all-in-one, but I unfortunately found that it dries very stiff.
The chape is by Lord of Battles, but since we settled on a wider belt than a matching buckle is available for, I used a 1-1/2" heel bar buckle from Buckleguy and made a matching plate from a wide brass strip, etched with ferric chloride. In order to allow the belt to be worn with the case or quiver, they have attached buckles and straps which go through slots cut in the belt. The buckles are the same type as the belt buckle, in a smaller size. The two knotted leather bands used to stabilize the quiver will eventually be trimmed down; they can even be removed entirely.
Monday, June 19, 2023
German hunting trousse, part X
I accidentally left the scales out overnight in what I thought was an aluminum tray. It turns out it was non-stainless steel. Dew collected under the scales in the morning, causing the scales to swell, the oak tannin to react with the steel and create black stains on the undersides of the scales, and the surface of the tray to rust. Also an animal pooped in the tray, though thankfully nowhere near the scales. The warping resided after a few days indoors.
I had earlier found that when the accessories, whose scales were attached with pitch glue, were allowed to get too hot, the glue softened and exuded out of the seams. I attached the cleaver's scales with epoxy and set the pins while it was still liquid. This was not a good idea, as the epoxy got onto the scales and was very difficult to wipe off. The finish is therefore duller than it should be. In this regard, it may have been better to use pitch glue, which would cool and harden rapidly.
The hilt is not comfortable to hold thanks to the protruding washers, but perhaps this would make for a more secure grip, or historical washers may not have been as highly domed as the ones I used. The pins required many little taps with a light ball peen hammer to tamp down the edges of the peens and prevent them from scratching the palm of my hand.
This project is far from over. It will require a specialized scabbard with side pockets for the accessories and custom steel mountings, and possibly a belt, before it can be considered complete.
Sunday, January 15, 2023
"Spare parts" hunting sword
As such, the fuller has a round start where it should be square. Also the hardware is a bit less ornate than would be normal on this type of sword. The belt buckle is from Bucklecastings. The crossguard is a Crazy Crow Bowie guard, hammered into a slight S-curve and with a pair of cold-forged volute finials silver-soldered on. The finials and all other brass hardware (except for the escutcheon pin added to prevent the pommel plate from rotating) are fabricated from various pieces of sheet and bar stock from Ace, with most detailing hand-filed. The difference between the Crazy Crow and Ace brasses are noticeable where the finials are attached to the quillon block because Crazy Crow's brass is more reddish. It's also softer yet more prone to cracking when cold-forged, even after annealing. I'm very lucky this guard didn't, but another one I tried to use for this project did when I attempted to "unroll" it a little. If it weren't for the prospect of cracking, I would have re-flattened the current guard, since I am finding that the finial bumps annoyingly against my index finger if I hold the grip wrong, which is why I tried to straighten the one that broke. The hilt is assembled with pitch glue.
All leather is veg-tan, stitched with linen cord and finished with homemade walnut hull dye, olive oil and beeswax. I did only two applications of dye. The second time, I stirred up the sediment from the bottom of the jar and painted it on evenly to produce a very dark brown, let it dry, re-moistened it with a wet brush and wiped it all off, leaving the leather a pecan shell color which is darker than its natural state, but not as much as the initial dye applications seem to promise. The oil and wax darken the leather further and bring out its natural orange color, which combines with the walnut dye to produce this orange-brown (without the walnut, the natural result would be what's commonly known as saddle tan). By the way, I think the near 17-inch length is about the most that a single-layer scabbard of unhardened leather can be and still be useable. It's already more flexible than I'd like; any longer and it would need a wooden core or for the leather to be baked or otherwise stiffened.
The grip is American walnut with linseed oil and oil-rosin varnish. I designed it to match my belt knife from 2017, and originally I planned to give the sword a wooden scabbard core with a sheath for the knife. However, I made a mistake when I tried to put the core halves together with pitch glue to make it water-resistant. It turns out that while pitch glue is good for joining leather to wood, it's not so good for joining wood to wood — which makes sense, otherwise it would've been more commonly used for that historically. The seams kept cracking even with light handling and finally broke apart completely when it fell off a desk, and with its edges saturated in pitch, I couldn't just reassemble it with hide glue, nor did I have the patience to make a new one. This isn't entirely a bad outcome. As is, the vertical carriage makes the hilt stick up uncomfortably close to my ribcage (I'll probably just use angled frogs from now on). Adding a side pocket for the knife would have required the locket to be even lower on the scabbard so that the knife could clear the frog, in turn requiring the hilt to be even higher relative to the frog and belt unless I wanted the frog to hang down even lower than it does, which would make drawing awkward — it already almost requires one hand to hold the frog down when drawing. I plan to eventually make a separate sheath for the knife that can just be tied to the belt, as the original is finished with modern dye and acrylic, and doesn't match the new leather in appearance.
The locket is soldered to the throat instead of being stapled directly to the scabbard. The chape is a rolled cone closed at the tip with a soldered 1/4-inch brass tack. Both the throat and chape are epoxied — I would normally want to staple the throat and use pitch glue, but in this case the scabbard fit the blade so tight when the throat was in place that there wasn't room to spare inside the scabbard for the method of stapling I've been using on other projects. So I used epoxy to hold the hardware on as best as possible. If I had known ahead of time that I was going to wind up with a single-layer leather scabbard, it would've made sense back when I made the locket to attach a staple to it, obviating the need for a throat and leaving the scabbard loose enough for the staple as well as allowing me to dispense with the only modern material this sword uses.
I had to remove a lot of the 1mm edge to get this blade cutting sharp, and it's still not a great cutter. It can chop into an old Halloween pumpkin, but just bounces off water-filled plastic bottles. Someone more skilled than me could probably make it sharper; however, the steep primary bevel resulting from the relatively thick, narrow blade would place a limit on how sharp it can be, unless you reprofiled it with a shallower grind. Also, the entire sword is less than two feet and weighs under one pound, so there's not much momentum or leverage behind blows. I can see this in the role of an informal town sword with some defensive use, which was common for the little hunting swords of this period. As such, this is probably a good representation of Resenter I.
Monday, January 2, 2023
German hunting trousse, part IX
Firstly, a method of how to fabricate the side ring rivet and affix it in such a way that it wouldn't rotate in the rivet hole had long eluded me. Many of the originals have spike-shaped extensions sticking up from the rings along the bolsters which I surmise were created by sophisticated forging techniques and incorporate extra pins. Fat chance of me accomplishing anything like that. However, not all of them are constructed this way, and I eventually came across a post on myArmoury by Lukas Mästle-Goer which shows an alternative method: The side guard - in his case a shell Nagel for a Rugger, but it would work just as well with a Waidpraxe's ring - has a rectangular base that fits into a slot on the face of the bolster, locking it in position.
With this understanding, I drilled a 5/8-inch hole in a bar of mild steel, cut out the ring around it with an angle grinder, and ground and filed its shank down to a round cross section 3/16 inch thick.
The other problem was no more complicated but will take longer to explain: Most hunting cleavers of the 17th century have a finger guard on the edge side of the blade that protrudes out past the blade shoulder. This seems to have been created in one of two ways: Either the bolsters are forged as a single piece that semi-encloses the tang, with the two bolsters held together by the finger guard itself, or they're made in two pieces and the tang also features a protrusion that they're sandwiched on either side of.
Because I can't weld and the Crazy Crow blade has no such extension, my first attempt to deal with the problem was to create a pair of bolsters with protruding finger guards, soldered together by a small piece of filler steel. However, this proved unfeasible. The filler piece was a hair too thin and the tang wouldn't fit into the guard. I tried grinding out the inside, but the solder wasn't strong enough to stand up to the vibrations and the guard fell apart. After re-soldering and re-grinding several times and getting nowhere, I put the whole thing on hold.
Again, myArmoury came to the rescue. At a later date, I found a post by Radovan Geist of a knife that looked a lot like the one I'm working on, although it is intended as a Bauerwehr (thus again a solid shell Nagel instead of a ring). It even had a little un-beveled section of blade shoulder just like the Crazy Crow blade's ricasso, which Radovan used as the support for the bolsters. Looking through my collection of hunting cleaver photos, I realized that a handful looked quite similar with small finger guards that didn't protrude past the edge of the blade. This was the solution. (I also copied his idea of adding a thinner pin hole to the blade shoulder so that the bolsters could be pinned there as well.)
Starting fresh, I cut two new pieces of mild steel in approximately the shape required. Another problem soon arose: The part of the blade that transitions from the tang to the ricasso becomes thinner, and while the transition is more-or-less flat on one face, it's curved on the other. This meant that while one bolster could just sit as it was and be pretty much flush with the blade, the other needed to be ground on the inside to match the curve; otherwise, it would teeter across the tang's surface, leaving a large gap on one edge or another.
The bolster partly through shaping. I managed to get it not quite so bad after a few more passes of the angle grinder's flap disc, but perfection eludes me. In this project I won't feel so bad about using a modern epoxy to fill the gaps..
Once that was done, getting the profile perfect was simply a matter of glueing, drilling, and grinding the edges flush with the tang.
After that, the bolsters could be detached and rough-shaped. Adding the slot for the ring was another tricky step: Unwilling to risk mayhem with the aggressive angle grinder, I instead used my Dremel with a fairly small flat stone grinding disc. This took longer but I believe reduced the chance of the slot coming out crooked. I finished it with coarse files.
Next I added some decorative grooves freehand with needle files, then polished everything up. Finally, it was time to peen the pins and rivet.
I epoxied first, then set the smaller pins - a cut section of 1/8-inch common nail as used throughout this project, and an annealed section of thinner finishing nail in the shoulder area. Then I ground and polished out the dings.
Thursday, September 22, 2022
German hunting trousse, part VIII
Using my trusty angle grinder, I reduced the size of the bird's-head, flattened the grip belly, and ground away as much of the finger guard as I felt comfortable removing. The slight bolster left behind is still not historically accurate, but I've resolved to live with it. I then applied the scales, pins and washers as with the fork.
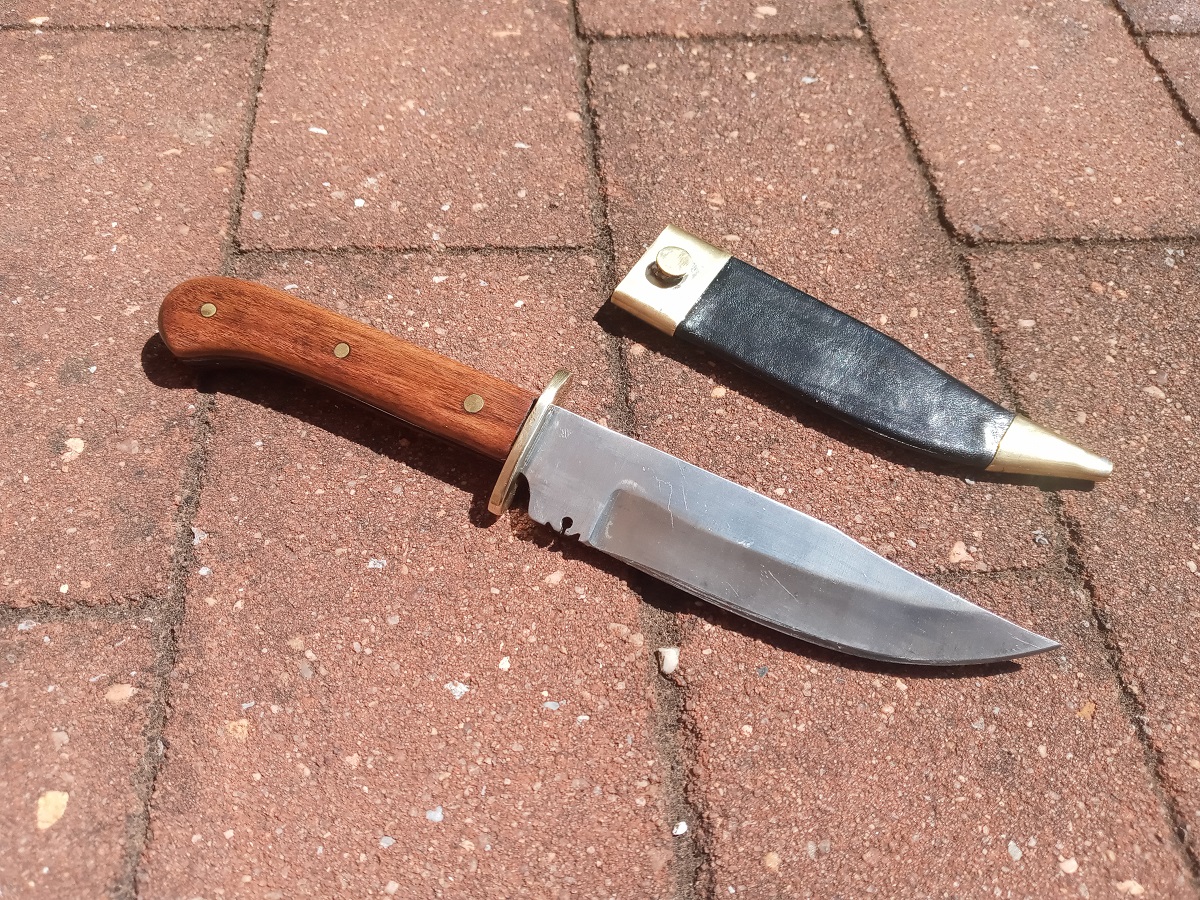
I haven't thrown away the old belduque blade; in fact, I already have a project in mind for it.
The set so far. You'll notice the sanded-down edges of the scales are much paler; this should be resolved when I get to varnishing.